Wednesday, December 31, 2008
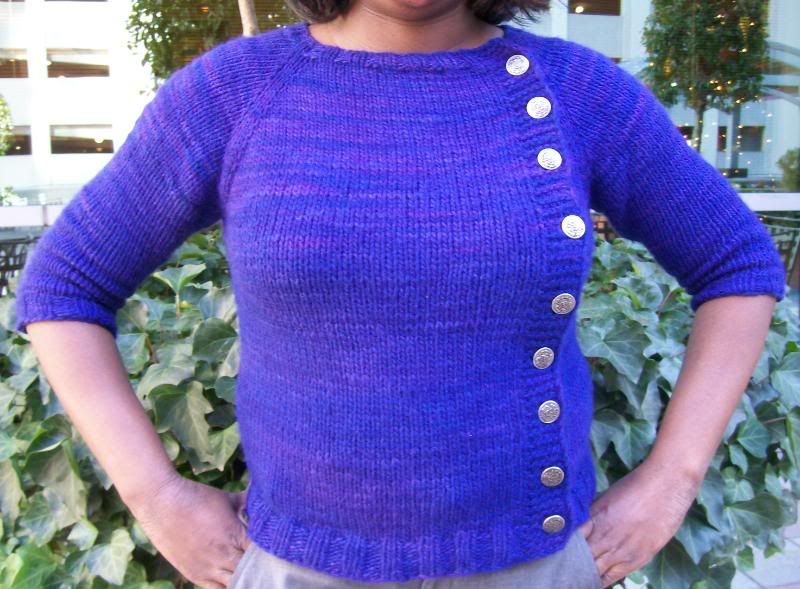
Pattern: You may have seen The Buttony Sweater several times out in blogland, as the design is well liked. I was actually hooked last year when I saw Emily's sweater :o) Ever since then it has always been in the forefront of my mind to make sure I knitted this sweater!
There has been many rumbles & grumbles about this pattern. And they are all warranted!!
The instructions are vague and can literally be cleared up with a couple of concise sentences by the designer.
It is true that if you have never done a sweater before, or at least some type of raglan project then I would not attempt this pattern, because again the directions are truly just a framework.
I really must THANK BrittanyLaine for clearing things up for me, and she hasn't even finished her own sweater yet!! ;op
Check below in the "Modifications" section for all the details on sailing thru this pattern.
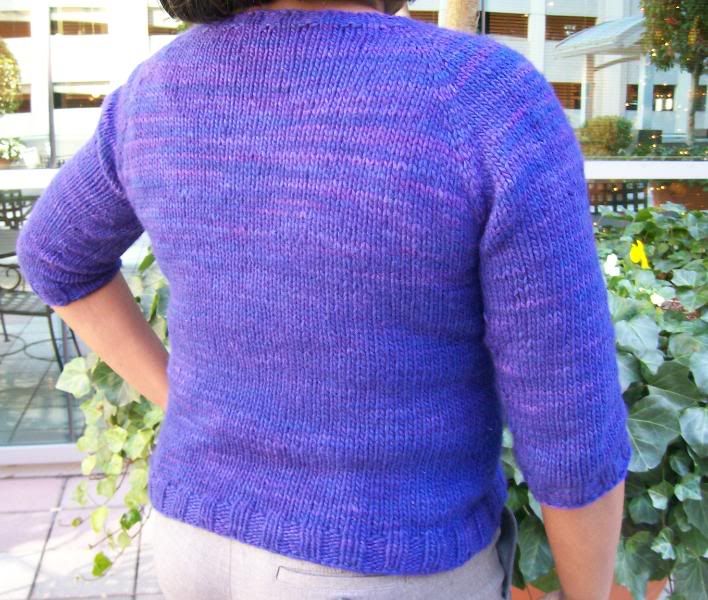 Size: I just love raglans. They are seamless (that alone is worth its weight in gold!), knitted from the top down so you can try it on as you go, and you just can't go wrong with the size as it is customized just for you!
Time: It took me about two weeks of peak and valley knitting.
The valley experience came from having to hold out and decipher what the heck I was doing....throwing out e-mail/ravelry lifelines and all! Haha!
And the peak knitting occurred during my Christmas holiday vacation time as I was clicking away non-stop!
Needles: US10 for the body & US8 for the ribbing both Denise & Harmonies (used for magic looping sleeves). I can't stand MLing on Denise needles.
Yarn: 3 balls of Malabrigo in Purple Mystery that I received in my last malabrigo swap from Lori (1KnuttyKnitter). Thanks again!! :o)
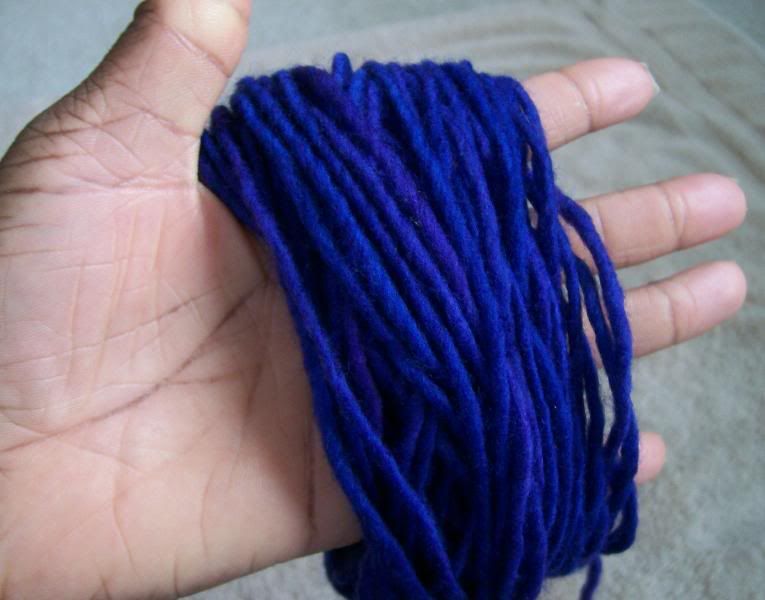 And this is all I had left after the sweater was completed. Thank goodness I decided on the 3/4 sleeves!! ;op
I had seen this colorway before as I had ordered it awhile back thinking I was going to get purple yarn...well it is a mystery alright! Haha! As it can't decide if it wants to be blue or purple!!
Your eyes aren't playing tricks on you and it is soooo hard to photograph the true color...I still don't think any of these pics in this post truly capture it (probably the first couple of pics ring true to color). However, as I mentioned in the beginning the dominant color is really blue, and it has grown on me. Not my norm but I like it now, as it is nice to have something different!
I am concerned about the 'Fuzz Factor' of the malabrigo and will make note in slowing down on the garments in this yarn (keeping it to just small accessories). As I've only worn this sweater twice and it is already getting the "felted" look...pooh
Cost: Since the yarn was gifted in a swap then it came at a great deal! As well as the buttons!
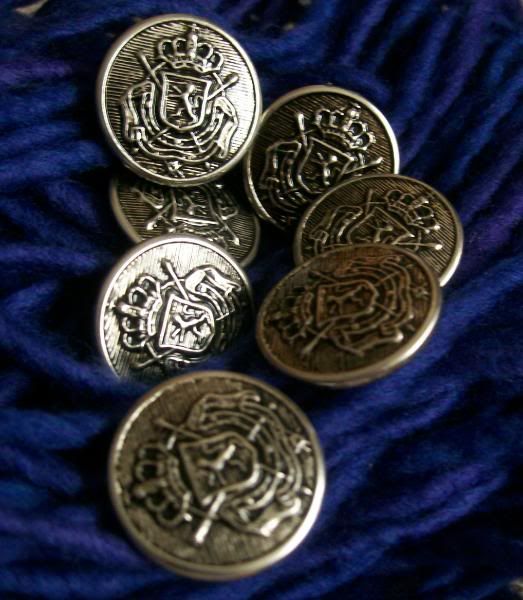 I just love w.al-mart buttons!! And will be so sad when their fabric/craft section shuts down completely here..sigh.
You all helped me with my selection and it was a great choice! :o) All 9 of them only costed $3.50. Yah!
What I learned: Believe it or not this truly was my 1st sweater!! I have done other garments before such as a vest, shrugs, and even the anthropologie capelet (thank goodness or I would have been dead in the water with this pattern!). But never a true sweater!! And I think it was a great first go at it! 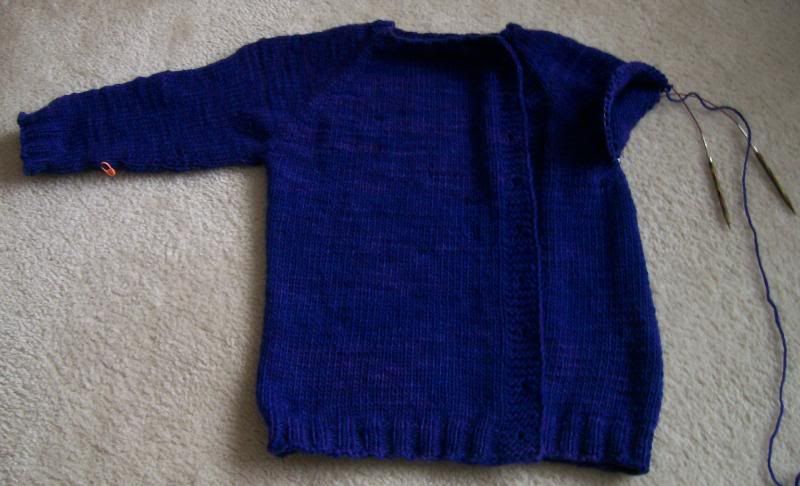
It was nice to be challenged in knowing when something is not right/clear in the pattern, and make the necessary adjustments. Lets me know I am growing a smidge as a knitter ;o)
Towards the end of knitting "Belle" I contemplated adding a grosgain ribbon on for an extra touch, but in the end decided not to go thru the unnecessary trouble. However, I did discover some cool links I wanted to share just for general knitting edification :o)
~ How to put a grosgain ribbon on by TechKnitter (Rav link)~ How to hand sew on fabric to your knitting by TechKnitter (Blog link)
Hey! You never know who might be interested, and I may need to come back to this one day too!
Modifications: Okay...this is where you need to grab a tall cold glass of sweet tea (hey I live in the south!) ;op and get comfy.
Here we go on clearing up a few things in the pattern that should help you in making this sweater:
*Most raglan patterns read as having a [border/left panel/sleeve/back/sleeve/right panel/border] for the setup row when you are placing your markers in between all of your stitches. However, this pattern "builds in" the left panel (Row 7) as you go and so readers may get confused (I surely did!!) as to why you are increasing right after the border...in this case that is correct!! And the stitchmarker moves out to accommodate for those increases. Just be consistent in making the same 6 garter stitches for your border on both sides!
*Row 9 (the increases) should read for clarification: Slip 1, K to within 1 stitch before marker, M1, K1, pm, K1, M1 *repeat to end*
*After you continue increasing until the sweater fits around the chest and under arms (you must try it on consistently for the right fit!!) 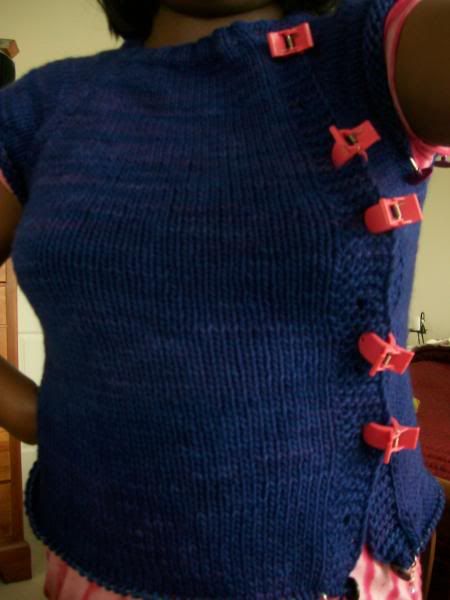 the pattern should have then prepared you to "divide for the sleeves" by simply knitting the front panel then transferring the 1st sleeve stitches onto holders/cord and continue knitting onto back (by joining the yarn to the section), then place the 2nd sleeve onto holders/cords continuing to knit the next panel.
My modifications:
Like so many others on Ravelry, I started my sweater with Taniaho's mods on:
~ Wanting a higher neckline and only CO 82 divided as following - 6 rib + 10 sleeve + 26 back + 10 sleeve + 24 front + 6 rib (remember the other front is 'built in').
~ I also slipped the 1st stitch purlwise for a clean edge
~ My increases were done by doing MLL and MLR
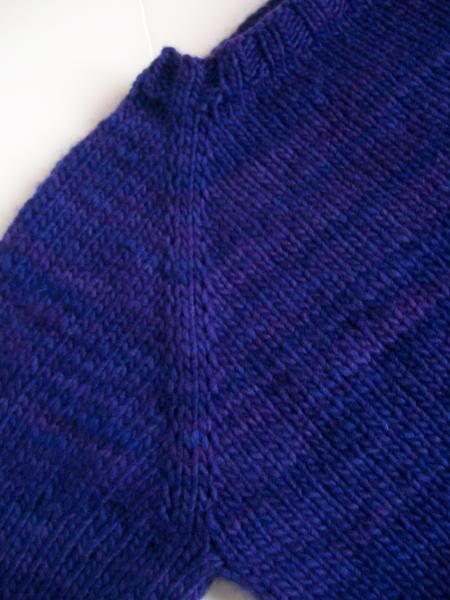
I loved how they turned out!
~ I picked up several extra stitches for under the armholes (10 to be exact).
~ And here are my notes on the stitch count for my armholes: Started with 44 sts, picked up 10 sts (54 sts), immediately decreased back down to 44 sts. Then knitted for about an inch or so evenly before starting decreases ever 8 rows per instructions until I reached 34 sts
~ Length of sleeves were shortened to 3/4 length since I did not have enough yarn for full length.
~ Because I did not continue increasing for the 'left panel' in beginning (like you are suppose to do!) but then picked it up much later on I had a "curve" effect at the top of the sweater (and it kind of resembles a kimono collar)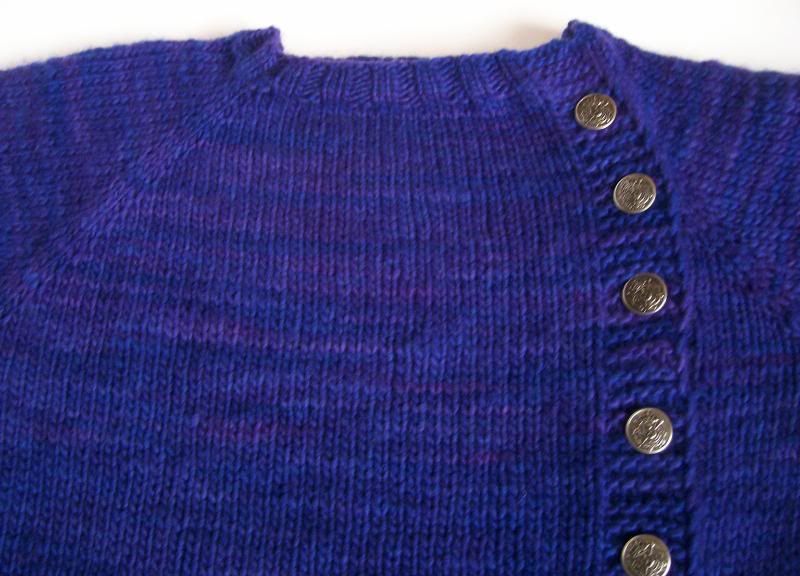
~ The length of my sweater only warranted 9 buttons rather than 12 called for in the pattern. I also did not place mine too close to the edge and did my buttonholes as: "K2, YO, K2tog, K2" instead.
~ I only did 8 rows of 2x2 ribbing for the body/sleeves along with the stretchy BO.
~ Sprayed block "Belle" for fear of stretching it out and know that over time with wear she will relax on her own.
My recommendations:
If you actually do the increases correctly (as I clarified above) then you will not have that kimono collar curve effect that I did. If that is the case, I would recommend to make a buttonhole at the very beginning, instead of after you have already knitted the instructed ten rows so you won't have a small "flap" at the top.
Waist shaping - I didn't do any since my body type is an apple=buddha belly ;op so I needed the extra room, rather than incorporating waist decreases. If you actually have a waist (unlike me) then I highly recommend it for this sweater since it is basically a "box" pattern.
Armhole decreases - please learn from me ;op I did mine immediately in one round (like on mitt thumbs) however if you do it that way you get a "puff sleeve" result (I have it on this sweater but barely noticeable). However, it is recommended (by my Purl friend Heather!) to decrease directly under the arm over a series of rounds (i.e. since I had 10 extra sts picked up, then decrease two a row for 5 rounds).
I think that about does it on my notes for this project. Hope it helps those who want to do it.
Verdict: Don't let my lengthy notes fool you. This is really an easy and fast sweater knit! I just love all the buttons running down my chest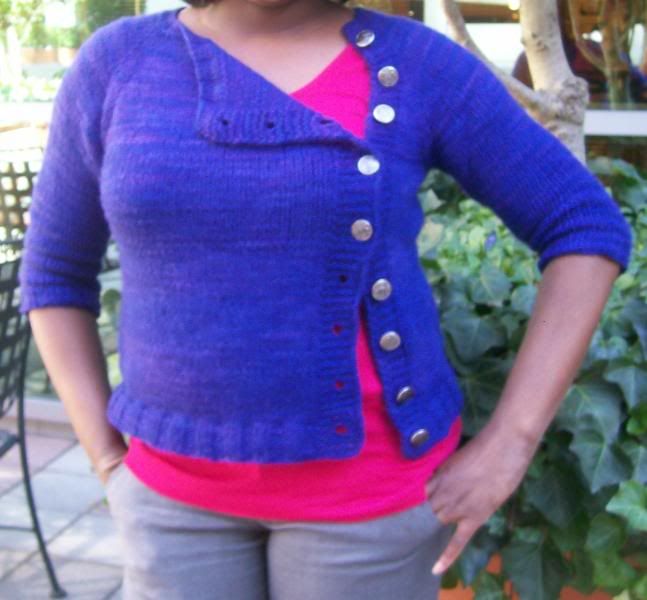
and you can jazz it up a bit too! :o)
Labels: Finished Objects





This sweater pattern is in my queue. I really appreciate you posting your mods. They'll definitely be read by me someday when I find the energy to knit a sweater again.
Happy new year!
It looks so good on you. It's such avgreat great feeling to have a success. Until my next one, I'll live vicariously.
~e-mail/ravelry lifelines ~ That was too funny lol.
Keep up the good work. Also the notes are excellent. I don't knit but I think it's great you give nice advice on issues you may encounter.
Way to make it work!
Happy New Year!
happy new year to you!!!!
Happy New Year!!!
Hope your Christmas was merry and bright and your New Year is very blessed indeed!
Blessings be yours in 2009.
It looks good girl. Leave it to you to try to jazz it up (talking about that end picture.).
My bust is a size 42. I'm just telling you so that you can get started knitting mine. Let me know when you're ready ;)
Happy new year!
Thanks so much for the pattern modifications. This sweater has been on my list for over a year now. Maybe I'll finally knit it this year.
P.S. Happy New Year!!! I hope it's a safe, blessed and fun one for you.
Hey, happy new year, too, hope it's a fantastic one for you. xxx
thanks for stopping by my blogplace...i will definitely be back on your's!
I can't believe it's your first sweater!!
Thank you for sharing all the modification and tip along the project... and i love the button very much too :D
All the best in 2009~
that sweater looks GREAT on you! i love the buttons.
i also love the DT hat you made the other day. way cute!
Belle is beautiful and looks GREAT on you.