Friday, December 16, 2011
It appears since last December 2010 I’ve been on a 6 month cycle of knitting items and just failed to post about them.
So let me give you some photos and some words to record them in knitting history and proof that I still do it.
JUST ENOUGH POLAR
Pattern:Just Enough Cowl
Yarn: Malabrigo Chunky in Polar Morn, 1 skein
Needle: Think I used a US10 or 11…so long ago I cant remember!
Timeframe: December 2010 over a couple days
Summary: Knitted this for a quick & easy project to shake the stress of the 2010 December month - Disney World, Marathon, Holidays, Move…..#whew
Perfect solution for the desire of a comfort knit!
Wanted it to match my Malabrigo Polar Morn beret knitted in 2009 to have a matching set.
BONE CRUSHER
Pattern: Boneyard Shawl
Yarn: Berroco Ultra Alpaca Tonal, 4 skeins in #6321 - Always wanted to knit with this yarn…didn’t like the rabbit hair though.
Needle: US8 on 40” circular
Timeframe: June-July – I wanted something to cover my arms in the church’s AC!
Summary: During this project I declared: “Crushing My Knitting Blues Away!!”
Bumpy start since I was on a knitting hiatus, but it was great practice on my M1L M1R again and of course the good ole fashion K,P! This is my 1st project since I tied the knot :)
HIS CHRIStmas HAT
Pattern:Hurricane Hat
Yarn: Noro Kogarashi – Had to get my 1st love in!! Hadn’t tried this line yet. Colorway #21. Used up ¾ of a hank
Needle: US5 magic looped
Timeframe: December 2011
Summary: My husband Chris’ 1st knitted item by me. He is super excited.
I wouldn’t knit for him until after we were married :) #newlyweds #8months #overdue
Because of the natural texture of the yarn (including color/specks) it really wasn’t necessary to do the pattern as you can barely see it…but it added character. Plan to make matching fingerless gloves for him.


Wednesday, February 10, 2010
 And I am luvin' them most in THIS season :)
Pattern/Duration/Fiber: Snowdrop Socks
 I started these in the summer time initially with a different pattern (Anastasia) but after 2 false starts (sizing was off b/c of gauge with thicker yarn - 46sts total - which is very small in this yarn) and then not grasping the "it's so easy it's hard" Anastasia pattern. I ripped them out completely and decided to use a different pattern that met me at just the "right knitting time" ;o)
Snowdrops has a very easy pattern repeat and gave the busy stripping yarn just enough busy artwork I was looking for on this pair. It was made for NORO (Silk Garden #84)!

Did these socks toe up 2AAT (two-at-a-time) on US1.5 (2.5mm) needles. When we had our "mini blizzard" (saying that with sarcasm) two weeks ago, I finally decided enough was enough and needed to finish them. I really wanted my feet to finally toast in a custom pair of winter wool socks.
Firsts: I swear this pair of socks has really given me a hard time...but that is what makes me heart them even more!
 There are a few peek-a-boo places that I can live with considering it was my first pass at this technique.
And I wrangled a 3 needle BO with very tiny needles....ur uh not the easy finishing that I had envisioned (I didn't position my "hold"/provisional needle correctly and had to re-thread it, as well as decrease to the original 43 sts again for 3 needle BO - will do it second to the last row next time rather than after the picot row)
It was also my first picot edge...that didn't go too well as I decided to K2 YO rather than just K1 YO...the picot edge was not as defined that way as I thought it would be....meh lesson learned.
Verdict: Despite my long and bumpy journey with this relatively easy pair of socks.

I am definitely over the moon with my very own first pair of NORO socks!! :)
Tuesday, January 12, 2010
Brushing up on the meaning of that song fit perfectly for this post!
~ "Long long ago"
~ "Days gone by"
~ "Old times"
~ "Once upon a time"
Yep I have some catching up to do on some FOs from 2009...you know that was 12 days ago and all :)
So here is a quick and dirty parade on the details of the items I managed to finish but was just too lazy to post up:

Pattern: This Baby Sophisticate and I will never stop signing the praises of this very easy/simple and free pattern!! It is a MUST on anyone's baby knit list!
So much so that you should make TWO!
Time: Can take 3-5 days of "un-focused" knitting time (the very most) to complete.
Needles/Yarn: Both on US8 needles
Sweater #1 in Moda Dea Washable Wool about 1.5 balls of yarn in Chocolate
Sweater #2 in Artesanal by Aslan Trends every bit of 1 hank in color #19 basically grey (from the shop)
Size: Both sweaters are the largest size and with the yarn it came out to be about 3-6 months?? depending on the weight of the yarn.
Modifications: On Sweater #1 all details on my Rav project but in a nutshell I shortened the body to the small length and would have done more garter on the collar. I also did increases in the body to widen it out for the "tummy". Sweater #2 - nothing barely had enough yarn!!
Verdict: Absolutely LUV this pattern. It is a MUST DO!

Pattern: Sushi Wallet Kit by One Stick Two Stick. I blogged about it here on where to get.
Time: Umpteen years...lol I really played around on this one. It has a lot of little pieces....sigh. Realistically a fast knit.
Mods: Because of all the many sushi rolls. I had made them a little bigger....made 6 of them but 3 of them came out really tiny so I ditched them...and by then I was tired of sewing them on.
My Firsts: Putting a zipper in a pouch/wallet

Verdict: My girlfriend loved it!! :) So it was worth it!

~ Project #3 Details ~

I've always wanted a chunky cowl around my neck to keep me warm. This made a very quick and easy Xmas gift for my boss :)
Time: Because it was a secret knit I did it in two nights.
Needles/Yarn: US 17 with 2 balls of Hometown USA yarn in Oklahoma City Green. My first time I used this yarn and it was a exact match for her new pea green leather gloves! Wish it had more yardage though.
Mods: Held yarn double for chunkiness. Did not twist the first stitch for mobius twist, just seamed down the middle.
Verdict: So elementary that anyone can do this project! And I really want to do one in hot red for myself :)
Welp! That should close out the 2009 knit F.O.s for me!
Sunday, December 20, 2009

Pattern: Meret (Mystery Beret) by Woolly Wormhead (Rav Link )
The pattern is intuitive and just enough zest to it so that it pops on your yarn!
Renee suggested it to me after I mentioned how I was itching to whip up a beret. Thanks for the recommendation it was a good one! As my original thought was to do my long coveted "yet to get to it" Gretel pattern, but then realized I didn't want to deal with the cabling at that particular moment.
Size: I started out with the medium and then increased to the large size (my head measures around 22"). I really could have gotten away with just the medium (with an extra pattern repeat) for the entire FO.
Time: This project was truly started b/c of the cold spells we have been having here (on a gloomy morning) and I've always wanted to knit up a beret!
Finished in just shy of a week, and it would have been faster but my schedule was super busy. The beret is a breeze and a pleasure to knit!
Needles: US 6 & US 8 with 32" cord on my harmony needles...magic looping on the brim and crown only.
Yarn/Cost: Yarn from waaay back when purchased in my Malabrigo Frenzy Haze ;op This is the color Polar Morn and probably got it for about nine bucks.

It only took one hank but for this pattern you will need EVERY BIT OF IT! So heed my words in not leaving a long tail and realizing you will need every ounce (and for my size I eliminated 2 rows of the last repeat to ensure I had enough to bind off!)
Modifications: As already mentioned this essentially is the large size, but I like my hats to fit "snug" at the brim so I casted-on for the medium on the US6s and then increased to the large stitch count. You also can tell I did the roll brim option (did 1" SS and 1" 1x1 rib)....luv it!! 
Did an extra pattern repeat for slouchy-ness, but did not finish off with Rows 1 & 2 as instructed as I knew I would not have enough yarn to finish the hat! (fyi) However, I see why the designer wanted you to finish with R1 & R2 (and you should for the aesthetic look), but if you don't it is not detrimental either ;op

This has not been blocked yet so I can just imagine how it will grow once it hits water. As I said, a medium with an extra repeat would have worked just fine for my noggin as well!
I intended for it to be extra slouchy and believe I got just the right balance I wanted...I luv it!
What I learned: Nothing monumental but just how to do the easy peasey roll brim on a hat. It adds such a great decorative look to the project!
Verdict: I am very satisfied with my beret!! As it has been in full rotation since it came off the needles! This is a fabulous pattern and great/easy project!
Saturday, November 21, 2009

~ Project Details ~
Pattern: wham bam thank you lamb! neckwarmer
Inspired by Christie's FO who reminded me that I had this in my que forever :)
Time: Started at lunch time was finished by bed time = super fast = perfect instant knit gratification
Needles: US13
Yarn: Lion Brand Thick & Quick in Grey Marble (was in a neutral mood)
What I learned: I love comfort knitting and wanted to stay in my garter therapy mode :)
Modifications: Not one thing
Verdict: Luv luv luv


Sunday, August 02, 2009


Size: Small (7.5) and only did quarter length socks this time for a few reasons.
Time: I kicked everything to the side in July re: Wrestle WIPmania just to cram these in at the very end of the month to finish just in time! ;o)
Needles: US1 (2.25) was initially done on a 32" cord which I knew would be too tight (esp. when it was time for gusset increases/turning the heel) so I "just" so happened to order another pair of needles in a 40" cord to have on hand.

Yarn/Cost: Last year when I switched jobs my old co-workers gave me a gift certificate to my fav LYS where I picked up some Fleece Artist Nova Wool in Rainforest.

Modifications: I didn't learn anything new on this project, which is why I didn't have a specific section for that; and my modifications really weren't anything to bring attention.
 For my increases on the toe I did (kfb) rather than a M1L/M1R (didn't see a big difference) and other than that I did everything as normal. Knitted until leg was 3" and cuff about a .5"
Verdict: Glad I finally got these socks out of my system as it was a pretty easy and well written pattern.

Now looking forward to my next pair of socks!!
Wednesday, June 17, 2009

~ Project Details ~
Pattern: Lacy Ribs Socks by Wendy D. Johnson from the Socks from the Toe Up book.
I joined the Ravelry Socks from the Toe Up KAL where each month the group will knit a pattern out of the book (for a prize of course)! Hope I get some more sock fiber goodness from the KAL's random drawing!!
Size: Small

And they are my best fitting socks thus far!! Not to mention my first pair that is full length!! (I typically get antsy and stop at the ankle lol)
Time: Started these the day I took the class with WendyKnits herself and finished up yesterday! So a little over a week (10 days)
The pattern repeats are easy and makes it a fast knit and grows quickly!
Needles: 2US & 1US (on ankles and cuffs) on 40" cord 
I could have used a US1 on the entire sock but didn't want it to take me forever ;op
Yarn/Cost: I can't believe I received this yarn 2 years ago from one of my swap angels! Boy time really flies!!

Extreme Yarn in the colorway of Sherbert Delight. Actually reminds me of Pink Lemonade...hence "Sock"ade!!
Modifications: They were very minor as I followed this pattern to a tee.
I knitted the toe to a full 2" so that the lace wouldn't reveal my little toes wigglin' all the way home ;o) Haha Didn't realize a lot of knitters prefer that in sock making and now so do I!
On the ankles I switched my needles to US1 as I was concerned of slouching with the stretch of the lace pattern and it worked out just fine (plus I think the ribbing in the entire pattern truly helps with the anti-sag factor).

I also used the same size needle on my cuffs as my ribbing for some reason always gets loose; and they were extended to 1.5" as I wanted to make sure they really hugged my lower calves.
I did a variation of the Russian BO stated in the book called a Stretchy BO (that I picked up a long time ago along the way), which to me is pretty much exactly the same if not the twin version.
So glad my BO was "just right" as they are not strangling me or too loose! Yay!
What I learned: The Judy Magic CO (JMCO - video link) .....well this knitting skill I already knew how to do from making the better bucket hats but never did it on socks before without using another needle as a "provisional" hold so that was different for me.
I truly don't see much difference between the JMCO and my handy dandy Turkish CO. I could argue that learning the Turkish CO is much easier than JMCO (as you gotta remember and figure out which fingers/yarn wrap where). So I still favor the Turkish CO since they pretty much look the same IMO.
I was thrilled to finally do a slip stitch heel from the toe up!! That was my first try at it and I just love the look without having to actually do it top down!! Score!!
Also learned something that it seems like No one ever talks about!!! Picking up those darn W/T (wrap/turns) SEAMLESSLY.

My pick ups were looking great on the "left" side of the heel (showing publicly) but on the "right" side looked a mess!! My wonderful Purl friend Heather helped me solve it by how the stitches were being positioned and then knit both together in the back (Thank You!!!). Mystery Solved!!
Verdict: Really enjoyed knitting the socks and it was great doing this sock as a KAL because it helped me push thru at the very end when I was getting tired of doing the leg (dang you gotta do the pattern all the way around Haha) ;op

Pennie (Extreme Yarn) told me to make something wonderful and I think I got some wonderful "Sock"ade!
Saturday, May 30, 2009
I don't know why that song (for those who get the title...hint: S.crub da G.round haha) popped up in my head.
But I started off crocheting in a square and now in a round circle!

~ Project Details ~
This blanket was a baby gift for a friend I cherish who had been asking for something knitted for herself awhile ago....well she got something crocheted for her baby instead! ;op

Pattern: Round Ripple Afghan by Sew On Fire Ministries
In general all the round ripple patterns are about the same, but glad I was steered towards this one b/c I could actually half way read the pattern on my own!
Still needed some guidance on exactly "which hole exactly do I insert my hook again?!?!" but once you get past the center and understand the repeats it is easy breezy!
Size: Diameter from point to point is 41.5 inches and a total of 31 rounds.
 Hope big enough for a baby?? Definitely big enough for my lap ;o)
Time: On/off during the month of May....honestly I got sick of working on this blanket over time and just trudged through it towards the end, as it wasn't going as fast as I would have liked in comparison to the granny squares Haha
Hook: G
Yarn: The yarn I used was Hobby Lobby I Love This Yarn! in #140 - Mid Green (2) #160 - Brown (1) #20 - Ivory (1)
 What I learned: To do the infamous ripple effect of course!!! And how to crochet in the round :)
Notes: As you can see I decided on doing a trio effect with the colors and the rotations went like this: Center - Green (first 6 rounds), then 4r brown beginning repeats with *1r white/4r green/2r brown*
 Border only 3r green 1r brown 2r white with 1 sc of green edging
Verdict: I think this is a perfect crochet baby blanket or laphan, as I plan to make one for myself in the future.

Saturday, May 09, 2009
crochet!!!

Pattern: Chocolate-covered Cherries Afghan by Lion Brand Yarn
I've always wanted to do a granny square....well...once I decided to put down the needles long enough to really get into crocheting.
I am here to declare that you are not a true crocheter until you've done a granny square!!! ;op
From the start I knew there would not be a bunch of mini squares (as most granny square afghans are traditionally done) by my hands; as I didn't want to put a whole lot of "elbow grease" in it (seaming, changing tons of colors, etc.)
With that being said One Big Ole Granny Square was perfect for me!! :o)

Presenting....Cella whose namesake comes from my absolute fav chocolate covered cherries!! How fitting ;o)
Time: I did this "lapghan" in honor of March Crochet Month working off and on it until April (about a month). It really is a smooth sailing project and quite addictive!
Size: My 2009 afghan (one has been done every year since Lizzie!) is 40 rounds total and measures at 52.5" x 48.5".
I never intended to make it that large until another Purl in my knitting group caught the granny square bug too (along with a couple others) and was making her project huge for a male recipient...so I thought I should keep going too! Haha!
I just love how it drapes over my legs and keeps me warm. Even cozier doubled up!
HOOK/Yarn: This is my 1st crochet project so my first time having to say "hook" vs. needles in my post and hitting the "crochet" button on Ravelry ;op which was just a bit different for me.
On this lapghan I used a size K hook with Vanna's Choice yarn (first time dipping into this yarn brand), which needed 6 balls in expresso and 4 balls in Cranberry. I will say VC is one of the better acrylic yarns I've used thus far.
Modifications: I pretty much stuck to the pattern (how hard is a granny square right?!? Very cookie cut).
However, since I was still trying to get comfortable with crocheting and getting my tension right I never did the 1 ch. in between the 3 dc.

And of course you may have noticed I did my "border" with 4 rounds in red and 3 rounds in brown ending with a SC edging. That is really not a mod, but more of a designer's choice ;o)
I will make a reminder note that in doing the edging for the corners to do 4sc next time versus 3sc as they are curling up a bit.
What I learned: That I was very proud of myself doing my first 100% crochet project...finally!
I also learned how to do color change, join new yarn, and weave all my ends in as I crocheted! Yay!
Towards the end I learned that crocheting can be addictive like knitting too :oD
Because....
I didn't want it to end
This was actually a gift to my close girlfriend for her 30th birthday (this weekend! which is why I can now blog about both afghans...she has it!!).
I whipped this one up even faster as I started it on a Thursday and it was washed and mail delivered to her by the following Friday!!
I was burning up the yarn on this one ;op Gotta love my ergonomic hook! ;o)
Specs on #2: On this one I used the I Love This Yarn brand only thru H.obby L.obby 2 balls of Red and 1 ball of Antique White (only one ball as you saw what happened to the second ball Hahaha).
These colors were chosen b/c it is both (my friend and I) sorority colors!! OOO-OOP!
I liked this particular yarn in that there was twice as much in the ball for a better value! It is also super soft, but after being washed it becomes a bit stiff and sheds more than the Vanna's Choice yarn. That is minor for the value! Next time I would just put a fabric softener liquid ball in my washer ;o)

Verdict: Again I am so proud to complete not 1 but 2 crochet projects coming straight out the gate!
This is absolutely a great pattern to start warming up your hookin' skills on!

And mighty cozy to knock the A/C chill off your legs this summer too ;o)
Sunday, May 03, 2009
back into knitting was ironically during Easter weekend 
Pattern: This is the Forest Canopy Shoulder Shawl, and you may have to do a double take b/c some of you will recognize/think you are looking at the Flower Basket shawl its twin! :o)
I selected this pattern over the other one because of the ease and simplicity of the instructions.
Susan Lawrence did an excellent job with orienting a newbie knitter to triangle shawls (yep my 1st one) with tons of information and explicit directions.
Size: Shawlette/scarf
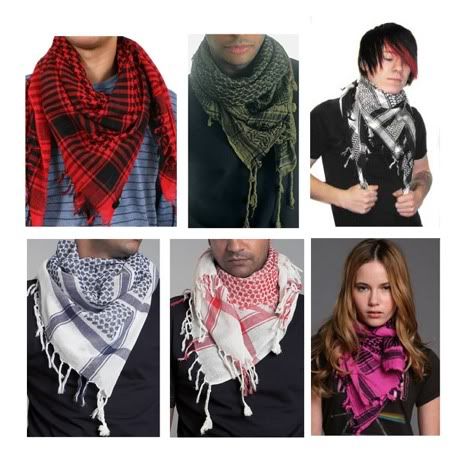
Have y'all seen the lastest trend with the P.alestinian scarves (that everyone & their mama is wearing)?
Well I've decided that mine is the chic and unique version of those! Haha! I like it a lot b/c it isn't the trend ;o)
Yarn/Cost: The yarn was gifted to me in my local knitting group during our Purly V.alentine swap back in February (yep I did a couple swaps at the beginning of the year).

And you may recall I featured it here on my blog if you want to learn more about it. It actually is NOT malabrigo! LOL
Because the yarn was picked out for me the colors are different from my usual, which I like as it forced me out of my color box! I really needed that! Since everything I knit can't be purple and red! Haha!
Needles: US 6 on 32" cord
Time: As mentioned earlier I started this project Easter weekend, and it really is an easy flowing fast knit. I only clocked in mileage during lunch time or after work here and there. The majority of the project was worked on during a car trip to D.C. so that easily knocked it out!
Saying all that it took about 2 weeks not focusing on it since I was just warming up my knit mojo, but also crocheting too.
What I learned: How to block a triangle shawl!! The rigged up and easy way w/o wires :o)

You may notice above the string going down the middle, and I also did it going across the top. You just stretch the string out put some pins around the border and viola!!
It was also great to finally understand the concept on how most triangle shawls come to life...I truly had no clue Haha
Modifications: I made none. The pattern called for 10 repeats. I did exactly that.
Mainly because I only had two hanks of yarn and was concerned I wouldn't have enough to finish the bottom edge repeat and bind off. I had some leftover but definitely not enough to do another pattern repeat.

I also knew right away that I needed to put the repeats on index cards to keep myself straight. And I am proud to say not one hang up and I never used a lifeline! Yay!! I love index cards!!
Measurements:
~Pre-Block~
Length: 17" Width: 35"
~Post-Block~
Length: 25" Width: 47"
Verdict: I am really not big on shawls, but wouldn't mind cranking one out from time to time (would love to do a big comfy one next).
Since it was my first time doing a triangular shawl (definitely recommend this one for any 1st timer!!), I know that I would need to have a "stick-to-it"ness on these projects as the rows just get longer and longer LOL

It truly was a pleasure to knit this project just as much as it is to wear!!